Connect with Metamask
Prerequisite
MetaMask Wallet New to MetaMask? Follow our step-by-step guide to set up your MetaMask Wallet and start securely managing your digital assets today.
Staking Guide
Step 1) Add the FIL chain in the MetaMask wallet
Currently, there are two ways to add the Filecoin Network to MetaMask:
Manual addition - input the information directly into MetaMask.
Automated addition - use the HashKing official staking website to add the information automatically.
1.1 Here are the steps to manually add the FIL chain to MetaMask:
Click on "Extensions" and open the "MetaMask" extension
Switch the network in "MetaMask" setting


Click on the current network
click "Add network"
click"add a network manually"
Setup Filecoin-EVM network on MetaMask
Network name:Filecoin-mainnet
New RPC URL:https://filecoin.chainup.net/rpc/v1
Chain ID:314
Currency symbol:FIL
Block explorer URL: https://filfox.info/en


click "save"
Once added successfully, MetaMask will automatically switch to the Filecoin mainnet
1.2 Steps for automatically adding the FIL chain to Metamask through HashKing
Go to the HashKing official website

Click "Connect Wallet"

Click on "Approve" to allow the site to add the network

Click on "Switch Network" to connect to Filecoin Mainnet

Upon Success, MetaMask will automatically switch to the Filecoin-EVM network

Step 2) Transfer assets to Filecoin-EVM
Currently, there are different prefixes . The addresses used in the Filecoin-EVM ecosystem start with F4 or 0X. You can view the corresponding addresses in "MetaMask" or "Block Explorer"
To view Filecoin deposit addresses, copy your MetaMask public address and search the address on an explorer. Here FilFox is shown as an example.

MetaMask & FilFox Transfer assets to Filecoin-EVM
2.1 Users can transfer Filecoins from other wallets or exchanges to MetaMask wallet address
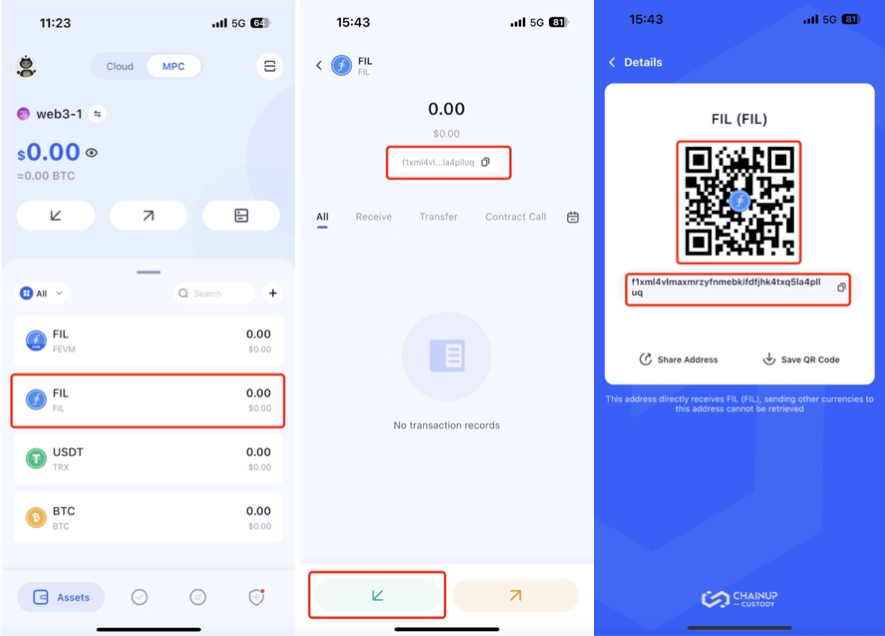
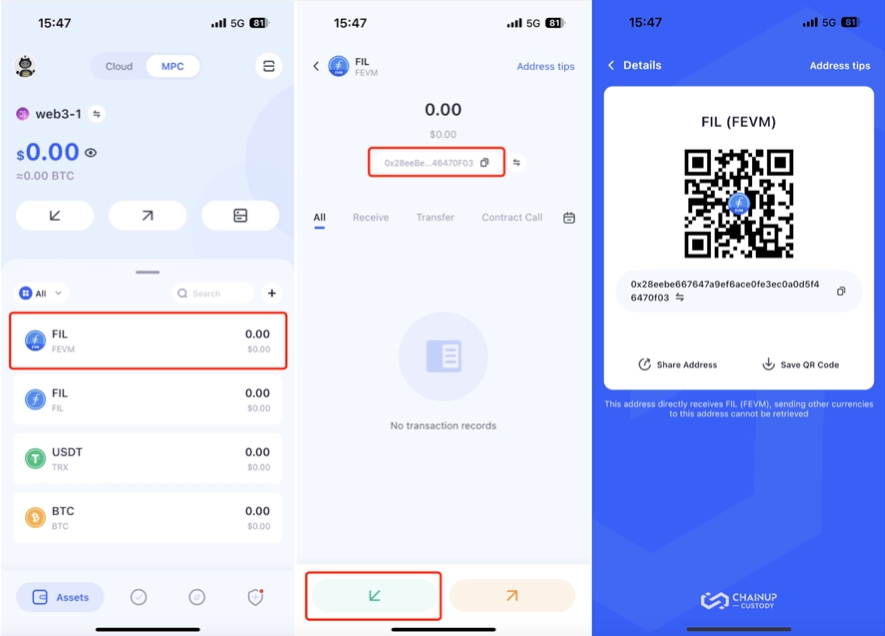
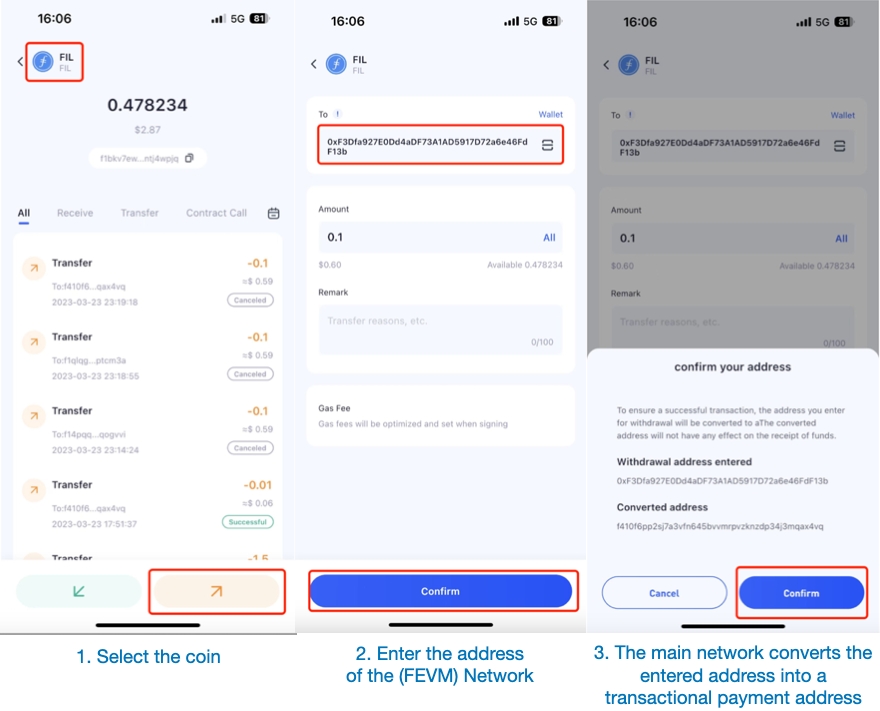
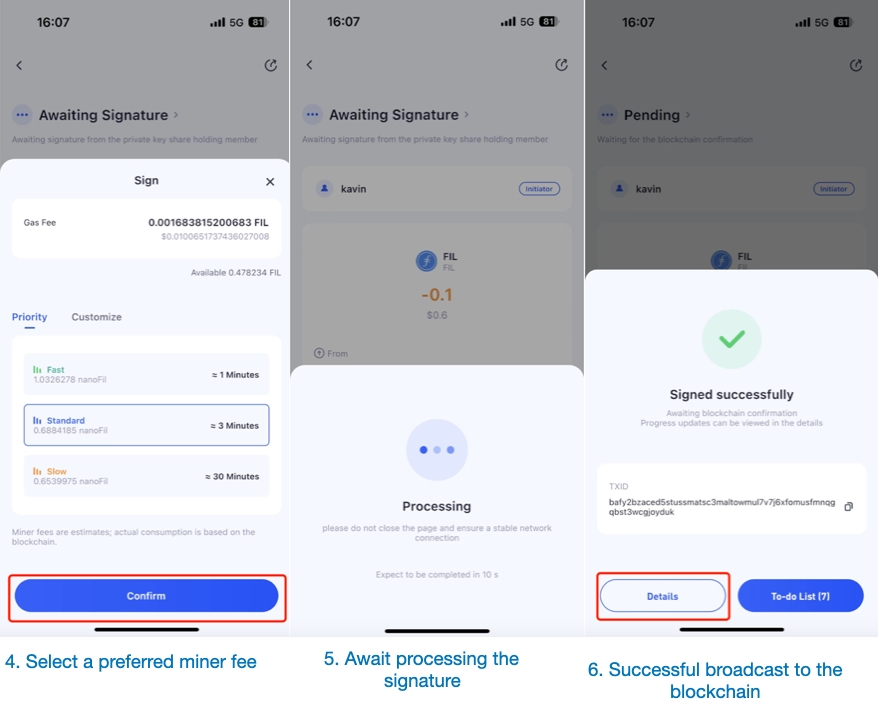
The ChainUp Custody Wallet solution is available to exchange FIL native network assets to FEVM
Steps to transfer FIL native network assets to FEVM with ChainUp Custody
Get the payment address of the FIL Native Network

Get the payment address of FEVM

Transfer assets to the FEVM network


Start staking
You may now transfer the Filecoin (FEVM) to your MetaMask wallet and start staking with HashKing .
Last updated